Pymunk is an easy-to-use pythonic 2d physics library that can be used whenever you need 2d rigid body physics from Python. Perfect when you need 2d physics in your game, demo or other application!
I install it with pip and python 2.7 and I test it with one example from the official website.
The source code is this:
import sys, random
import os
description = """
---- Newton's Cradle ----
A screensaver version of Newton's Cradle with an interactive mode
/s - Run in fullscreen screensaver mode
/p #### - Display a preview of the screensaver using a window handler
/i - Interactive mode
"""
if len(sys.argv) < 2:
print(description)
sys.exit()
is_interactive = False
display_flags = 0
if sys.argv[1] == "/p": # preview mode
os.environ['SDL_VIDEODRIVER'] = 'windib'
os.environ['SDL_WINDOWID'] = sys.argv[2]
display_size = (100, 100)
is_interactive = False
### We must set OS env before the pygame imports..
import pygame
from pygame.locals import *
from pygame.color import *
if sys.argv[1] == "/s": # fullscreen screensaver mode
display_size = (0, 0)
is_interactive = False
display_flags = display_flags | FULLSCREEN # FULLSCREEN) # | DOUBLEBUF | HWSURFACE )
elif sys.argv[1] == "/i": # interactive
display_size = (600, 600)
is_interactive = True
import pymunk as pm
from pymunk import Vec2d
def drawcircle(image, colour, origin, radius, width=0):
if width == 0:
pygame.draw.circle(image, colour, origin, int(radius))
else:
if radius > 65534 / 5:
radius = 65534 / 5
circle = pygame.Surface([radius * 2 + width, radius * 2 + width]).convert_alpha()
circle.fill([0, 0, 0, 0])
pygame.draw.circle(circle, colour, [circle.get_width() / 2, circle.get_height() / 2], radius + (width / 2))
if int(radius - (width / 2)) > 0:
pygame.draw.circle(circle, [0, 0, 0, 0], [circle.get_width() / 2, circle.get_height() / 2],
abs(int(radius - (width / 2))))
image.blit(circle, [origin[0] - (circle.get_width() / 2), origin[1] - (circle.get_height() / 2)])
def reset_bodies(space):
for body in space.bodies:
body.position = Vec2d(body.start_position)
body.force = 0, 0
body.torque = 0
body.velocity = 0, 0
body.angular_velocity = 0
color = random.choice(list(THECOLORS.values()))
for shape in space.shapes:
shape.color = color
def main():
pygame.init()
screen = pygame.display.set_mode(display_size, display_flags)
width, height = screen.get_size()
def to_pygame(p):
"""Small hack to convert pymunk to pygame coordinates"""
return int(p.x), int(-p.y + height)
def from_pygame(p):
return to_pygame(p)
clock = pygame.time.Clock()
running = True
font = pygame.font.Font(None, 16)
### Physics stuff
space = pm.Space()
space.gravity = (0.0, -1900.0)
space.damping = 0.999 # to prevent it from blowing up.
mouse_body = pm.Body(body_type=pm.Body.KINEMATIC)
bodies = []
for x in range(-100, 150, 50):
x += width / 2
offset_y = height / 2
mass = 10
radius = 25
moment = pm.moment_for_circle(mass, 0, radius, (0, 0))
body = pm.Body(mass, moment)
body.position = (x, -125 + offset_y)
body.start_position = Vec2d(body.position)
shape = pm.Circle(body, radius)
shape.elasticity = 0.9999999
space.add(body, shape)
bodies.append(body)
pj = pm.PinJoint(space.static_body, body, (x, 125 + offset_y), (0, 0))
space.add(pj)
reset_bodies(space)
selected = None
if not is_interactive:
pygame.time.set_timer(USEREVENT + 1, 70000) # apply force
pygame.time.set_timer(USEREVENT + 2, 120000) # reset
pygame.event.post(pygame.event.Event(USEREVENT + 1))
pygame.mouse.set_visible(False)
while running:
for event in pygame.event.get():
if event.type == QUIT:
running = False
elif event.type == KEYDOWN and event.key == K_p:
pygame.image.save(screen, "newtons_cradle.png")
if event.type == pygame.USEREVENT + 1:
r = random.randint(1, 4)
for body in bodies[0:r]:
body.apply_impulse_at_local_point((-6000, 0))
if event.type == pygame.USEREVENT + 2:
reset_bodies(space)
elif event.type == KEYDOWN and event.key == K_r and is_interactive:
reset_bodies(space)
elif event.type == KEYDOWN and event.key == K_f and is_interactive:
r = random.randint(1, 4)
for body in bodies[0:r]:
body.apply_impulse_at_local_point((-6000, 0))
elif event.type == MOUSEBUTTONDOWN and is_interactive:
if selected != None:
space.remove(selected)
p = from_pygame(Vec2d(event.pos))
hit = space.point_query_nearest(p, 0, pm.ShapeFilter())
if hit != None:
shape = hit.shape
rest_length = mouse_body.position.get_distance(shape.body.position)
ds = pm.DampedSpring(mouse_body, shape.body, (0, 0), (0, 0), rest_length, 1000, 10)
space.add(ds)
selected = ds
elif event.type == MOUSEBUTTONUP and is_interactive:
if selected != None:
space.remove(selected)
selected = None
elif event.type == KEYDOWN:
running = False
elif event.type == MOUSEBUTTONDOWN:
running = False
mpos = pygame.mouse.get_pos()
p = from_pygame(Vec2d(mpos))
mouse_body.position = p
### Clear screen
screen.fill(THECOLORS["black"])
### Draw stuff
for c in space.constraints:
pv1 = c.a.position + c.anchor_a
pv2 = c.b.position + c.anchor_b
p1 = to_pygame(pv1)
p2 = to_pygame(pv2)
pygame.draw.aalines(screen, THECOLORS["lightgray"], False, [p1, p2])
for ball in space.shapes:
p = to_pygame(ball.body.position)
drawcircle(screen, ball.color, p, int(ball.radius), 0)
# pygame.draw.circle(screen, ball.color, p, int(ball.radius), 0)
### Update physics
fps = 50
iterations = 25
dt = 1.0 / float(fps) / float(iterations)
for x in range(iterations): # 10 iterations to get a more stable simulation
space.step(dt)
### Flip screen
if is_interactive:
screen.blit(font.render("fps: " + str(clock.get_fps()), 1, THECOLORS["white"]), (0, 0))
screen.blit(font.render("Press left mouse button and drag to interact", 1, THECOLORS["darkgrey"]),
(5, height - 35))
screen.blit(font.render("Press R to reset, any other key to quit", 1, THECOLORS["darkgrey"]),
(5, height - 20))
pygame.display.flip()
clock.tick(fps)
if __name__ == '__main__':
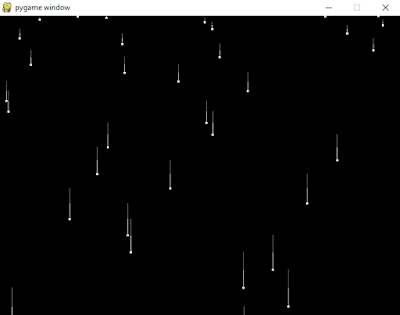
sys.exit(main()I test with this command:
C:\Python27>python.exe newtons_cradle.py /i
The result work well, see the next image: