import pygame
import time
pygame.init()
pygame.mixer.music.load('file.ogg')
pygame.mixer.music.play()
time.sleep(1.5)
duminică, 12 martie 2017
sâmbătă, 1 octombrie 2016
PyGame : Effects - part 003.
This is a part 003 from pygame tutorial series and is a little more advanced for you.
The reason comes with get_palette and set_palette functions and gif image with 8 bits.
Of course, I could use pygame.PixelArray but is not the purpose of this tutorial.
The python script comes with one surface screen, one surface for image and also one surface of a blur.
I set the resolution to be sized at 640,480. I have motion vectors for two directions and with this I make a circle follow path from sin and cos.
The path come from x and y variables ( width and height).
With angle_xd and angle_yd I increment the angles.
This is the result:
This is the source code:
import pygame, pygame.transform, pygame.image
from pygame.surfarray import *
from pygame.locals import *
from numpy import *
resolution  = array((640,480))
PI  = 3.14159
DEG2RAD = PI/180
print resolution[0], resolution[1]

def main():

    pygame.init()

    screen = pygame.display.set_mode(resolution,0,8)
    sprite = pygame.image.load("test_random.gif")
    sprite.set_palette(sprite.get_palette())
    sprite.set_colorkey((255,255,255))
    screen.set_palette(sprite.get_palette())
    area_work = pygame.Surface(resolution,0,8)
    area_work.set_palette(sprite.get_palette())

    angle_xd = 0
    angle_yd = 0

    while 1:

        for e in pygame.event.get():
            if e.type in (QUIT,KEYDOWN,MOUSEBUTTONDOWN):
                return
        x    = ((resolution[0])/5)*cos((angle_xd*DEG2RAD))+((resolution[0])/2-128)
        print x
        y    = ((resolution[1])/5)*sin((angle_yd*DEG2RAD))+((resolution[1])/2-128)
        angle_xd  += 1
        angle_yd  += 1
        area_work = pygame.transform.scale(screen, (resolution[0]+8,resolution[1]+8))
        tmp = pygame.surfarray.array2d(area_work)
        blur = array(tmp)
        blur[1:,:]  += tmp[:-1,:]*32
        blur[:-1,:] += tmp[1:,:]*32
        blur[:,1:]  += tmp[:,:-1]*32
        blur[:,:-1] += tmp[:,1:]*32
        blur /= 31
        blit_array(screen, blur[8:resolution[0]+32,8:resolution[1]+32])
        screen.blit(sprite,(x,y))
 pygame.display.update()

if __name__ == '__main__': main()joi, 22 septembrie 2016
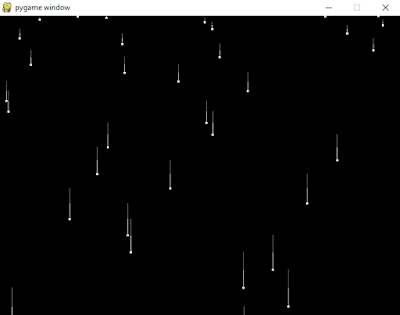
PyGame : Effects - part 002.
This is another tutorial about pygame and python 2.7 is very simple.
I make this tutorial for educational purposes for the children versus python language.
I used for most common variables the Romanian language and this will allow you to understand well the variables versus python language script.
I used this version of python:
Also, I have two python class to make the drop and trail drop into the screen.
This is the effect result:
This is the python script:
I make this tutorial for educational purposes for the children versus python language.
I used for most common variables the Romanian language and this will allow you to understand well the variables versus python language script.
I used this version of python:
C:\Python27>python.exe
Python 2.7.8 (default, Jun 30 2014, 16:08:48) [MSC v.1500 64 bit (AMD64)] on win32
Type "help", "copyright", "credits" or "license" for more information.
>>> Imagine_hasurata - fill the image ImaginePicatura - draw dropPregatire - setup drawingAlso, I have two python class to make the drop and trail drop into the screen.
This is the effect result:
This is the python script:
#! /usr/bin/env python
import pygame, random
from pygame.locals import *

aleator = 1.5
ecran_x = 640
ecran_y = 480
acceleratie = 1.0
marime_picatura = (3, 3)
culoare_start = 255
culoare_stop = 0
culoare_intre = 2

def Imagine_hasurata(f, i):
    lungime = f - i + 1
    interval = (culoare_start - culoare_stop) / (culoare_intre + 1)
    imagini = []
    for x in range(culoare_intre):
        image = pygame.Surface((1, lungime)).convert()
        color = culoare_start - (x + 1)*interval
        image.fill((color, color, color))
        imagini.append(image)
    return imagini

def ImaginePicatura():
    image = pygame.Surface(marime_picatura).convert()
    image.fill((culoare_start, culoare_start, culoare_start))
    return image

def Pregatire(Picatura, trasa):
    y = 0.0
    v = 0.0
    ylist = []
    while int(y) <  ecran_y:
        ylist.insert(0, int(y))
        v = v + acceleratie
        y = y + v
    Picatura.ylist = ylist[:]
    ylist.insert(0, ecran_y)
    trasa.imageset = []
    for i in range(len(ylist) - 1):
        trasa.imageset.insert(0, Imagine_hasurata(ylist[i], ylist[i + 1]))

class Picatura(pygame.sprite.Sprite):
    def __init__(self, x):
        pygame.sprite.Sprite.__init__(self, self.updategroup, self.displaygroup)
        self.rect = self.image.get_rect()
        self.rect.centerx = x
        self.trasaindex = 0
        self.ynum = len(self.ylist)
    def update(self):
        self.ynum = self.ynum - 1
        if self.ynum < 0:
            self.kill()
        else:
            self.rect.centery = self.ylist[self.ynum]
            Trasare(self, self.trasaindex)
            self.trasaindex = self.trasaindex + 1

class Trasare(pygame.sprite.Sprite):
    def __init__(self, Picatura, trasaindex):
        pygame.sprite.Sprite.__init__(self, self.updategroup)
        self.imagini = self.imageset[trasaindex]
        self.rect = self.imagini[0].get_rect()
        self.rect.midtop = Picatura.rect.center
        self.update = self.start
    def start(self):
        self.add(self.displaygroup)
        self.update = self.fade
        self.imagenum = 0
        self.fade()
    def fade(self):
        if self.imagenum == len(self.imagini):
            self.kill()
        else:
            self.image = self.imagini[self.imagenum]
            self.imagenum = self.imagenum + 1

def main():
    pygame.init()
    ecran = pygame.display.set_mode((ecran_x, ecran_y))
    fundal = pygame.Surface(ecran.get_rect().size)

    updategroup = pygame.sprite.Group()
    displaygroup = pygame.sprite.RenderUpdates()

    Picatura.image = ImaginePicatura()
    Pregatire(Picatura, Trasare)

    for thing in [Picatura, Trasare]:
        thing.updategroup = updategroup
        thing.displaygroup = displaygroup

    ceas = pygame.time.Clock()

    while 1:

        for event in pygame.event.get():
            if event.type == QUIT:
                return

        displaygroup.clear(ecran, fundal)
        updategroup.update()

        if random.random() < aleator:
            Picatura(random.randrange(ecran_x))

        pygame.display.update(displaygroup.draw(ecran))
        ceas.tick(10)

if __name__ == '__main__':
    main()
miercuri, 27 ianuarie 2016
PyGame : Effects - part 001.
Today I come one simple and nice tutorial about pygame python module over python version 3.4.
The python script just makes two effects.
First is one fade effect from transparent to black. I also added one green color.
Another effect come with the dizzy star base math python module and random python module.
Because this combined colors green and blue are funny I make star blue.
The script is simple :
- created variables;
- make pygame windows;
- make fade background function;
- make one class for shape ( and this can be updated );
- make loop the game and escape key option;
- ... and finally, add shape class and variable into loop pygame script.
# Cătălin George Feștilă
# http://free-tutorials.org

import pygame
import random
import math
from pygame.locals import *

#initialize pygame and random seed
pygame.init()
random.seed()

#transparent to black for fade effect
def background_fade():
    rec = pygame.Surface(screensize)
    if frame != 0:
        rec.set_alpha(10)
        rec.fill((0,0,0))
    else:
        rec.set_alpha(255)
        rec.fill(draw_color)
    screen.blit(rec,(0,0))
    del rec

#all mathmatical shapes
class shape():
    xy = [0,0]   #location
    rot = [0.0,0.0] #rotation
    color = '.'   #color/shape value
    dim_size = 1
 #constructor
    def __init__(self,xy,dim_size,color):
        self.xy = xy
        self.dim_size = dim_size

        self.rot = [(random.random()*(math.pi)),.002]
        self.color = color

 #define shape
    def set_shape(self,color):
        self.color = color

 #draw shape
    def draw(self):
        #rotation
        self.rot[0] += self.rot[1]
        if self.rot[0] > math.pi*2:
            self.rot[0] -= math.pi*2
        #blue/star
        if self.color == 'blue':
            for x in range(5):
                pygame.draw.aaline(screen,(0,0,255),\
                        (((math.cos(self.rot[0]+(x*((math.pi*2)/5)))*self.dim_size)+self.xy[0]),\
                        ((math.sin(self.rot[0]+(x*((math.pi*2)/5)))*self.dim_size)+self.xy[1])),\
                        (((math.cos(self.rot[0]+((x+2)*((math.pi*2)/5)))*self.dim_size)+self.xy[0]),\
                        ((math.sin(self.rot[0]+((x+2)*((math.pi*2)/5)))*self.dim_size)+self.xy[1])),\
                        1)

#start main pygame effect
while 1:
    #create variable for pygame
    screensize = (640,480)
    screen = pygame.display.set_mode(screensize, 0, 32)
    clock = pygame.time.Clock()
    #set frame
    frame = 0
    draw_color = [0,255,0]
    #reftime = pygame.time.get_ticks()
    text = pygame.font.Font(None,25)
    #start drawing
    while 1:
        clock.tick(30)
        shapetest=shape((320,240),100,'blue')
        shapetest.draw()
        #check if is pressed any key
        pygame.event.get()
        #if is press escape key
        if pygame.key.get_pressed()[pygame.K_ESCAPE]:
            pygame.quit()
            exit()
        #print clock.get_fps() on windows title
        pygame.display.set_caption(str(clock.get_fps()))
        pygame.display.update()
        #start fade background
        background_fade()
        #change var frame for background_fade
        frame += 1
        #stop when frame is 100
        if frame == 100:
         break

    frame = 0

    pygame.display.update()
    background_fade()

frame += 1 sâmbătă, 26 decembrie 2015
duminică, 21 decembrie 2014
PyGame : Using sound, mixer, volume, channels, fade-in and out effect.
PyGame module comes with sound feature and this allows users to test some effects.
The next source code will make a window and also will play a song.
After, You can test all effects with python version 3.4.1.
Just see the keys from source code and test it. The song is an ogg file.
I used this sample from a recording of the album Through the Devil Softly by the artist Hope Sandoval and The Warm Inventions from here.
Let's see the python script:
import pygame, sys

blue = (55, 75, 155)

pygame.init()
pygame.display.set_caption('pygame - using sound effect')
size = [460, 100]
screen = pygame.display.set_mode(size)
clock = pygame.time.Clock()

# load sound file
pygame.mixer.init(frequency=22050, size=-16, channels=2, buffer=4096)

pygame.mixer.music.set_volume(0.5)
sound = pygame.mixer.Sound("bird.ogg")
snd_array = pygame.sndarray.array(sound)
snd_out = pygame.sndarray.make_sound(snd_array)
snd_out.play()

mychannel=pygame.mixer.find_channel()
while pygame.mixer.find_channel is None:
    print (pygame.mixer.find_channel)
allchannels=pygame.mixer.get_num_channels()
print ('all channels - ',allchannels)
print ('duration -',sound.get_length(),' seconds')
print ('press 1 - play sound')
print ('press 2 - play sound in a loop')
print ('press 3 - play sound with 9 seconds fade-in effect')
print ('press 4 - play sound just for 9 seconds')
print ('press 5 - play sound 3 more times')
print ('press 9 - stop playing with fadeout effect set 9 ')
print ('press 0 - stop playing instantly')
print ('press up arrow key - up volume')
print ('press down arrow key - down volume')

while True:
    for event in pygame.event.get():
        if event.type == pygame.QUIT:
            pygame.quit()
            sys.exit()
        if event.type == pygame.KEYDOWN:
            if event.key == pygame.K_1:
                sound.play()
            if event.key == pygame.K_2:
                sound.play(-1)
            if event.key == pygame.K_3:
                sound.play(-1, fade_ms=9000)
            if event.key == pygame.K_4:
                sound.play(-1, 9000)
            if event.key == pygame.K_5:
                sound.play(3)
            if event.key == pygame.K_9:
                sound.fadeout(9000)
            if event.key == pygame.K_0:
                sound.stop()
            if event.key == pygame.K_UP:
                sound.set_volume(sound.get_volume()+0.1)
                print(sound.get_volume())
            if event.key == pygame.K_DOWN:
                sound.set_volume(sound.get_volume()-0.1)
                print(sound.get_volume())
    screen.fill(blue)
    pygame.display.update()
clock.tick(10) sâmbătă, 7 septembrie 2013
PyGame : First interface - part 6.
I will show you how to make a menu with buttons using pygame module.
The example is simple but you can update with new features.
I will make some buttons: Start game, Options and Exit game.
The pygame come with rect function to draw rectangles.
I start with one python class named my_button.
Like any graphic interface is needed to make visual elements and link with actions.
For each button, I draw one rectangle with text and functions to check mouse.
The functions of my_button are:
label - will add some text;
color - change color when the button is hovering:
draw - will deal with drawing the button, color, and mouse...;
check_hover - return boolean value based on mous eover my_button;
import pygame

pygame.init()

class my_button:
   def __init__(self, text):
      self.text = text
      self.is_hover = False
      self.default_color = (100,100,100)
      self.hover_color = (0,255,25)
      self.font_color = (0,0,255)
      self.obj = None

   def label(self):
      font = pygame.font.Font(None, 22)
      return font.render(self.text, 1, self.font_color)

   def color(self):
      if self.is_hover:
         return self.hover_color
      else:
         return self.default_color

   def draw(self, screen, mouse, rect_coord, label_coord):
      self.obj  = pygame.draw.rect(screen, self.color(), rect_coord)
      screen.blit(self.label(), label_coord)
      self.check_hover(mouse)

   def check_hover(self, mouse):
      if self.obj.collidepoint(mouse):
         self.is_hover = True
      else:
         self.is_hover = False

if __name__ == '__main__':


   start = my_button('Start game')
   option = my_button('Option')
   exit = my_button('Exit game')

   screen = pygame.display.set_mode((400,350))
   clock = pygame.time.Clock()

   run = True
   while run:
      screen.fill((0,0,0))
      mouse = pygame.mouse.get_pos()
      for event in pygame.event.get():
         if event.type == pygame.QUIT:
            run = False
         elif event.type == pygame.MOUSEBUTTONDOWN:
            if my_button_.obj.collidepoint(mouse):
               print('my_button start clicked')
            elif my_button_2.obj.collidepoint(mouse):
               print('my_button option clicked')
            elif my_button_3.obj.collidepoint(mouse):
               print('my_button exit clicked')

      start.draw(screen, mouse, (100,100,120,22), (125,103))
      option.draw(screen, mouse, (100,130,120,22), (125,133))
      exit.draw(screen, mouse, (100,160,120,22), (125,163))

      pygame.display.update()
      clock.tick(50)
Abonați-vă la:
Postări (Atom)